Cash middleware diagnostic checklist
Identify the cash hardware and lane, compare Genmega and Fujitsu pictures, and inspect cash-service connections.
Establish the lane and hardware
Confirm the middleware computer belongs to the affected lane. Record the acceptor and dispenser models, power state, cassette state, and displayed error. Fujitsu, ITL and Genmega configurations differ; match the installed hardware.
Read-only checks
List serial devices:
pyserial-ports -v
Read recent cash-service logs (bounded to the latest 100 lines for review):
sudo journalctl -u cash-middleware.service -n 100 --no-pager
Review configuration locally in /etc/default/cash-middleware and the middleware .env file. Keep access values out of tickets and this site.
What to compare
- Set
CASH_ENABLED=TRUEto enable cash in the NXT Wash middleware environment. - USB device names and serial numbers can help distinguish devices; a generic
convertermatch can be ambiguous when multiple adapters are connected. - Serial-port enumeration alone does not establish whether a serial device is connected.
- PC COM3 is recorded as Linux /dev/ttyS2; verify the actual device path on the installed computer.
- XPT 5+ notes describe moving the acceptor USB connection to the motherboard and using a serial-to-USB connection for the dispenser. Confirm the installed hardware before wiring changes.
Model-specific clues
F56/F53/F50 notes associate F8 89 with an open kiosk door in observed cases. Genmega notes describe TIMEOUT / CDN0 and a dispenser FF display as reasons to inspect the model's configuration. These are clues, not universal diagnoses.
Identify the cash devices
Match the dispenser model before comparing its connections or display. Select an image for the full-size view.
Connection layout
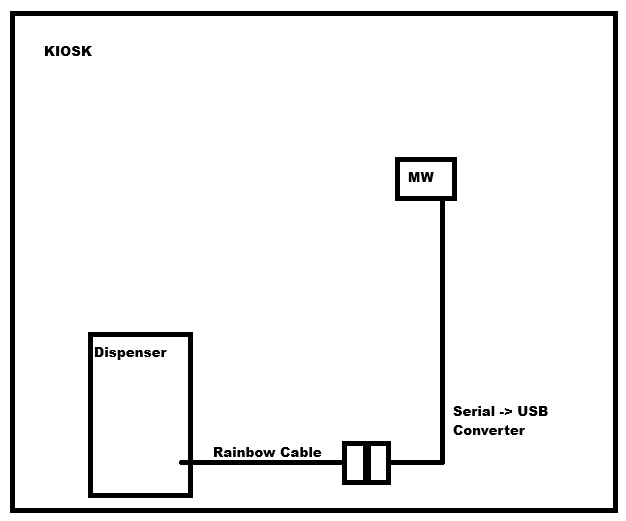
The dispenser connects through a rainbow cable and serial-to-USB converter to the middleware computer. Match the cable and connector to the installed model.
Fujitsu F56 / F53 / F50
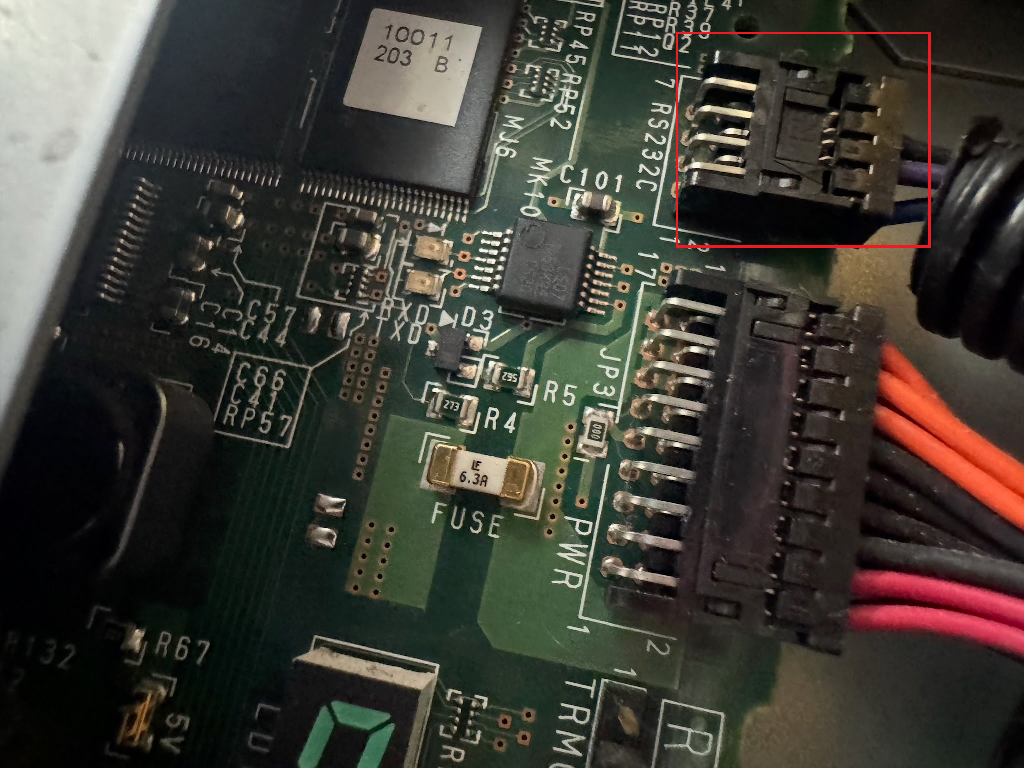
The F56/F53/F50 board photo marks the RS232C connection in red. This photo is a connector-location reference; use the applicable retrofit guide for the installed board's jumper instructions.
Genmega HCDU
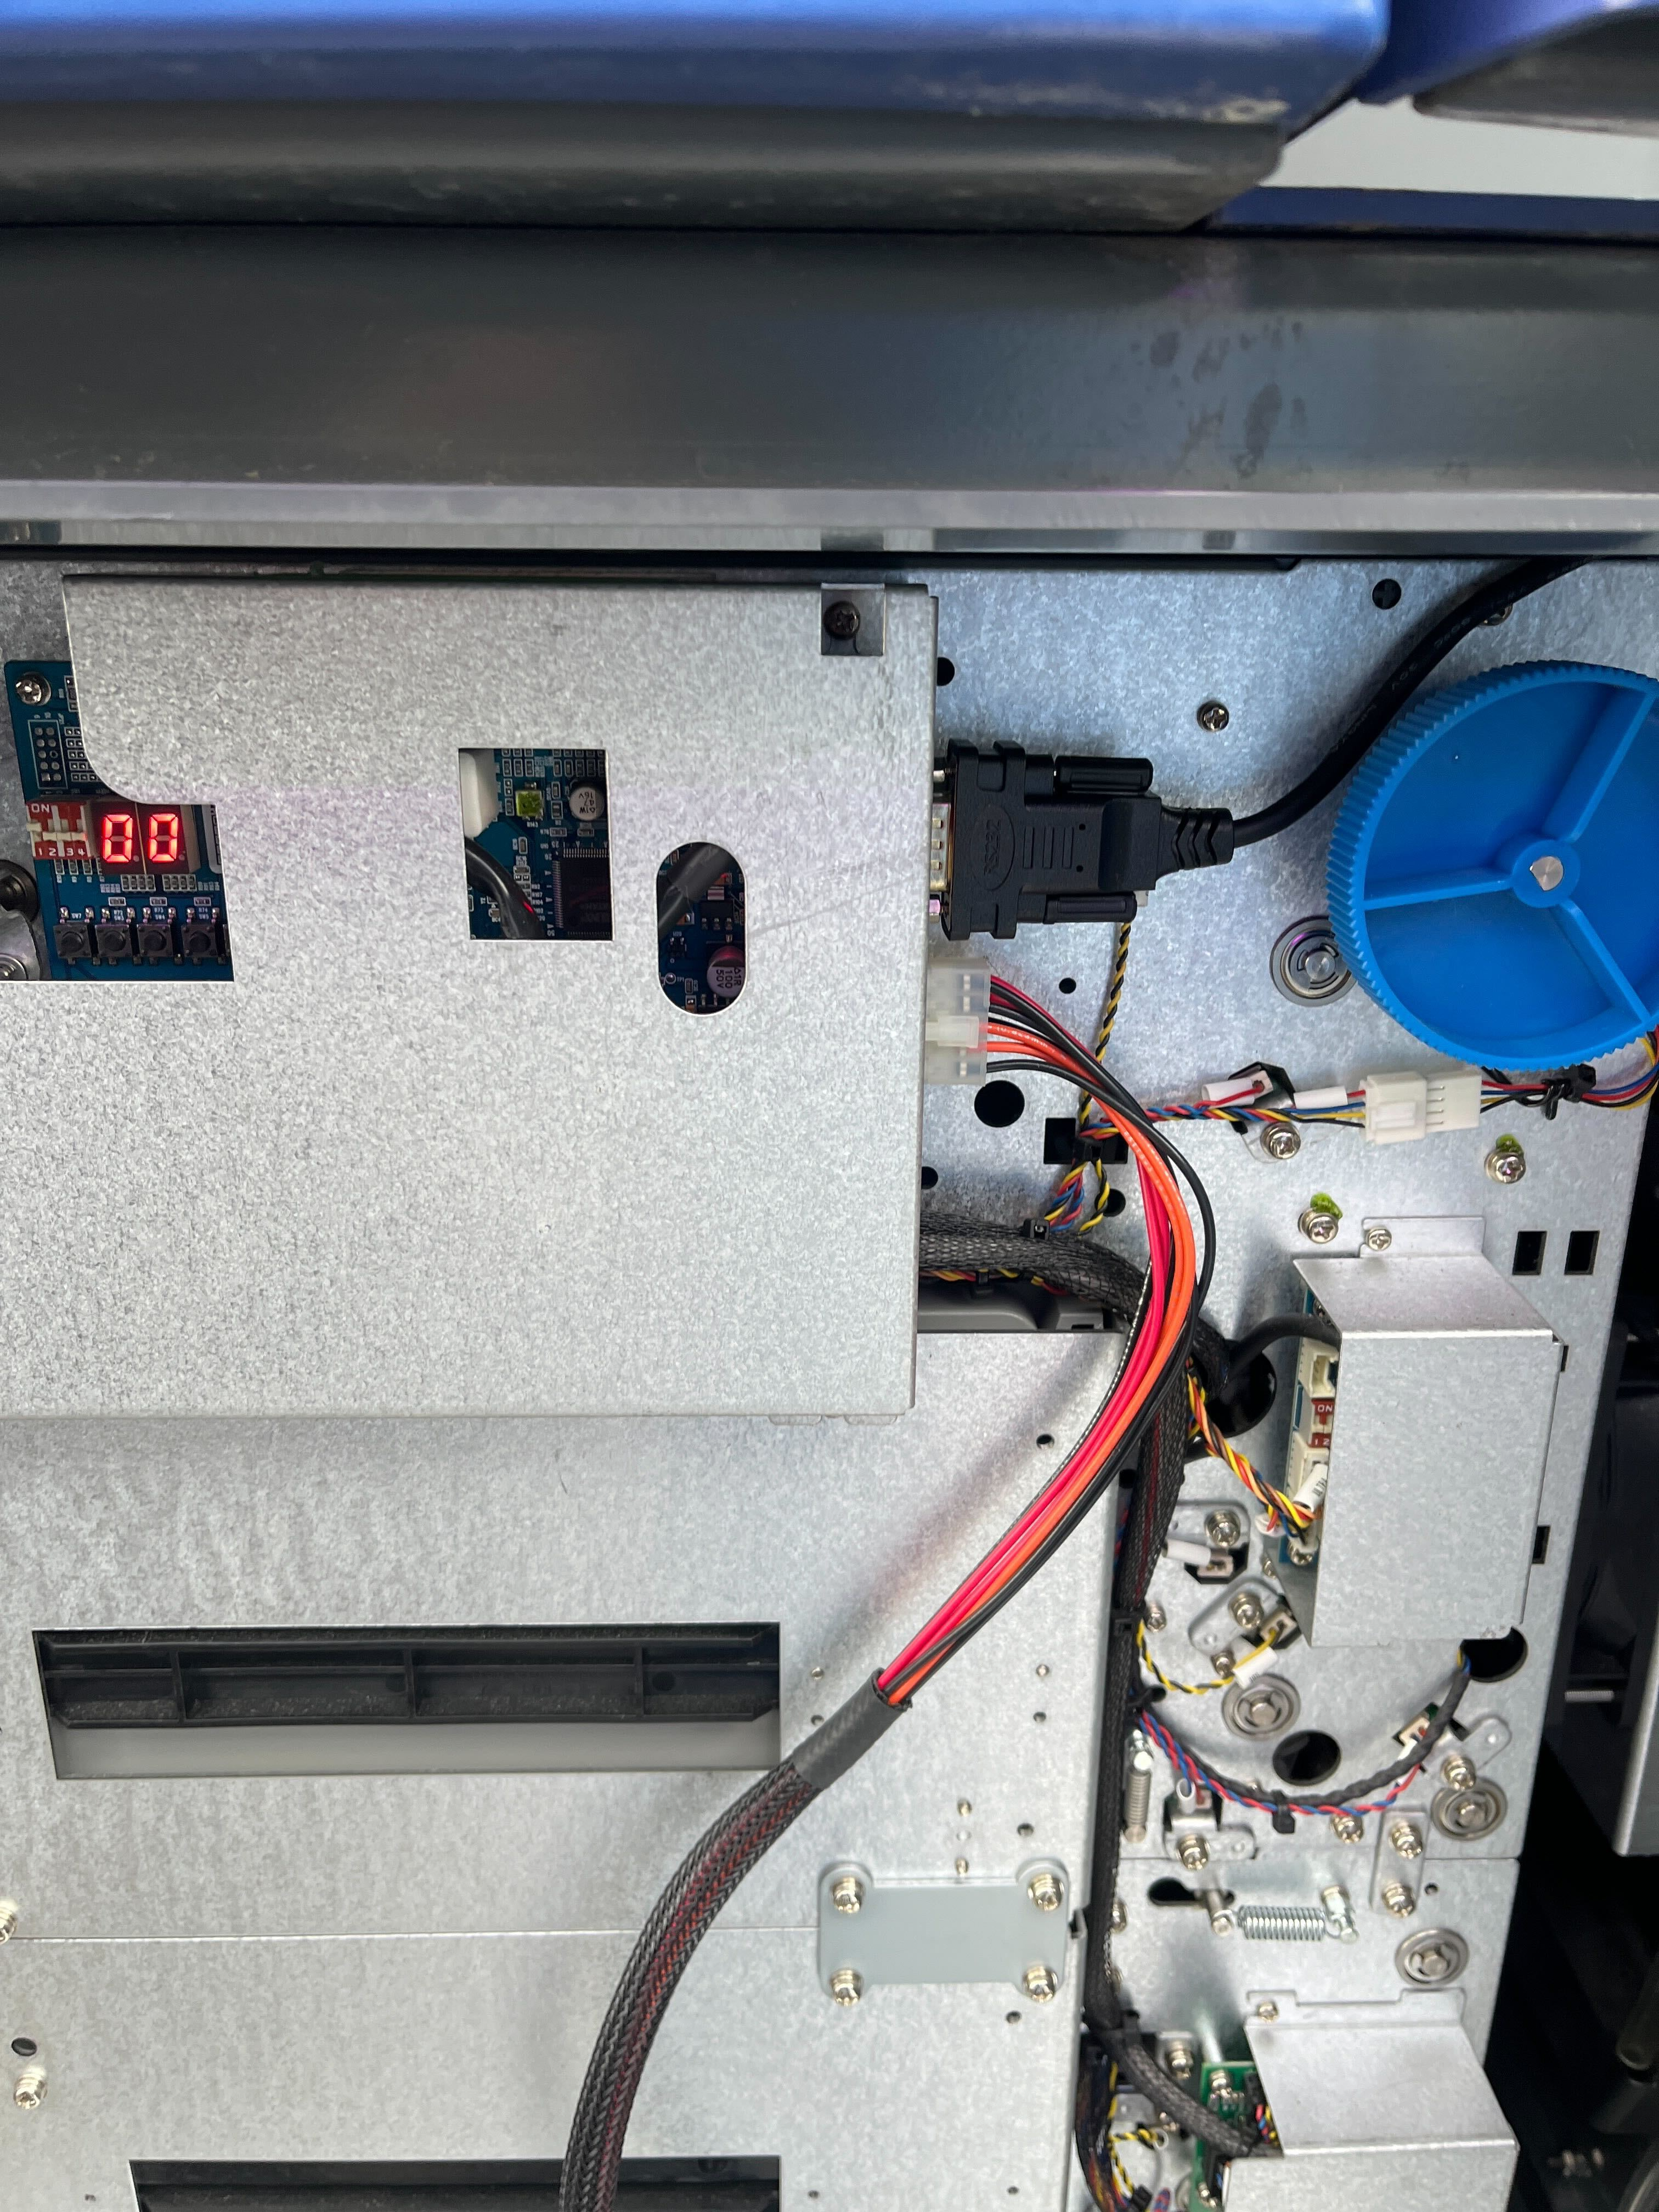
The Genmega HCDU photo shows its diagnostic display and serial connection.
Fujitsu F400
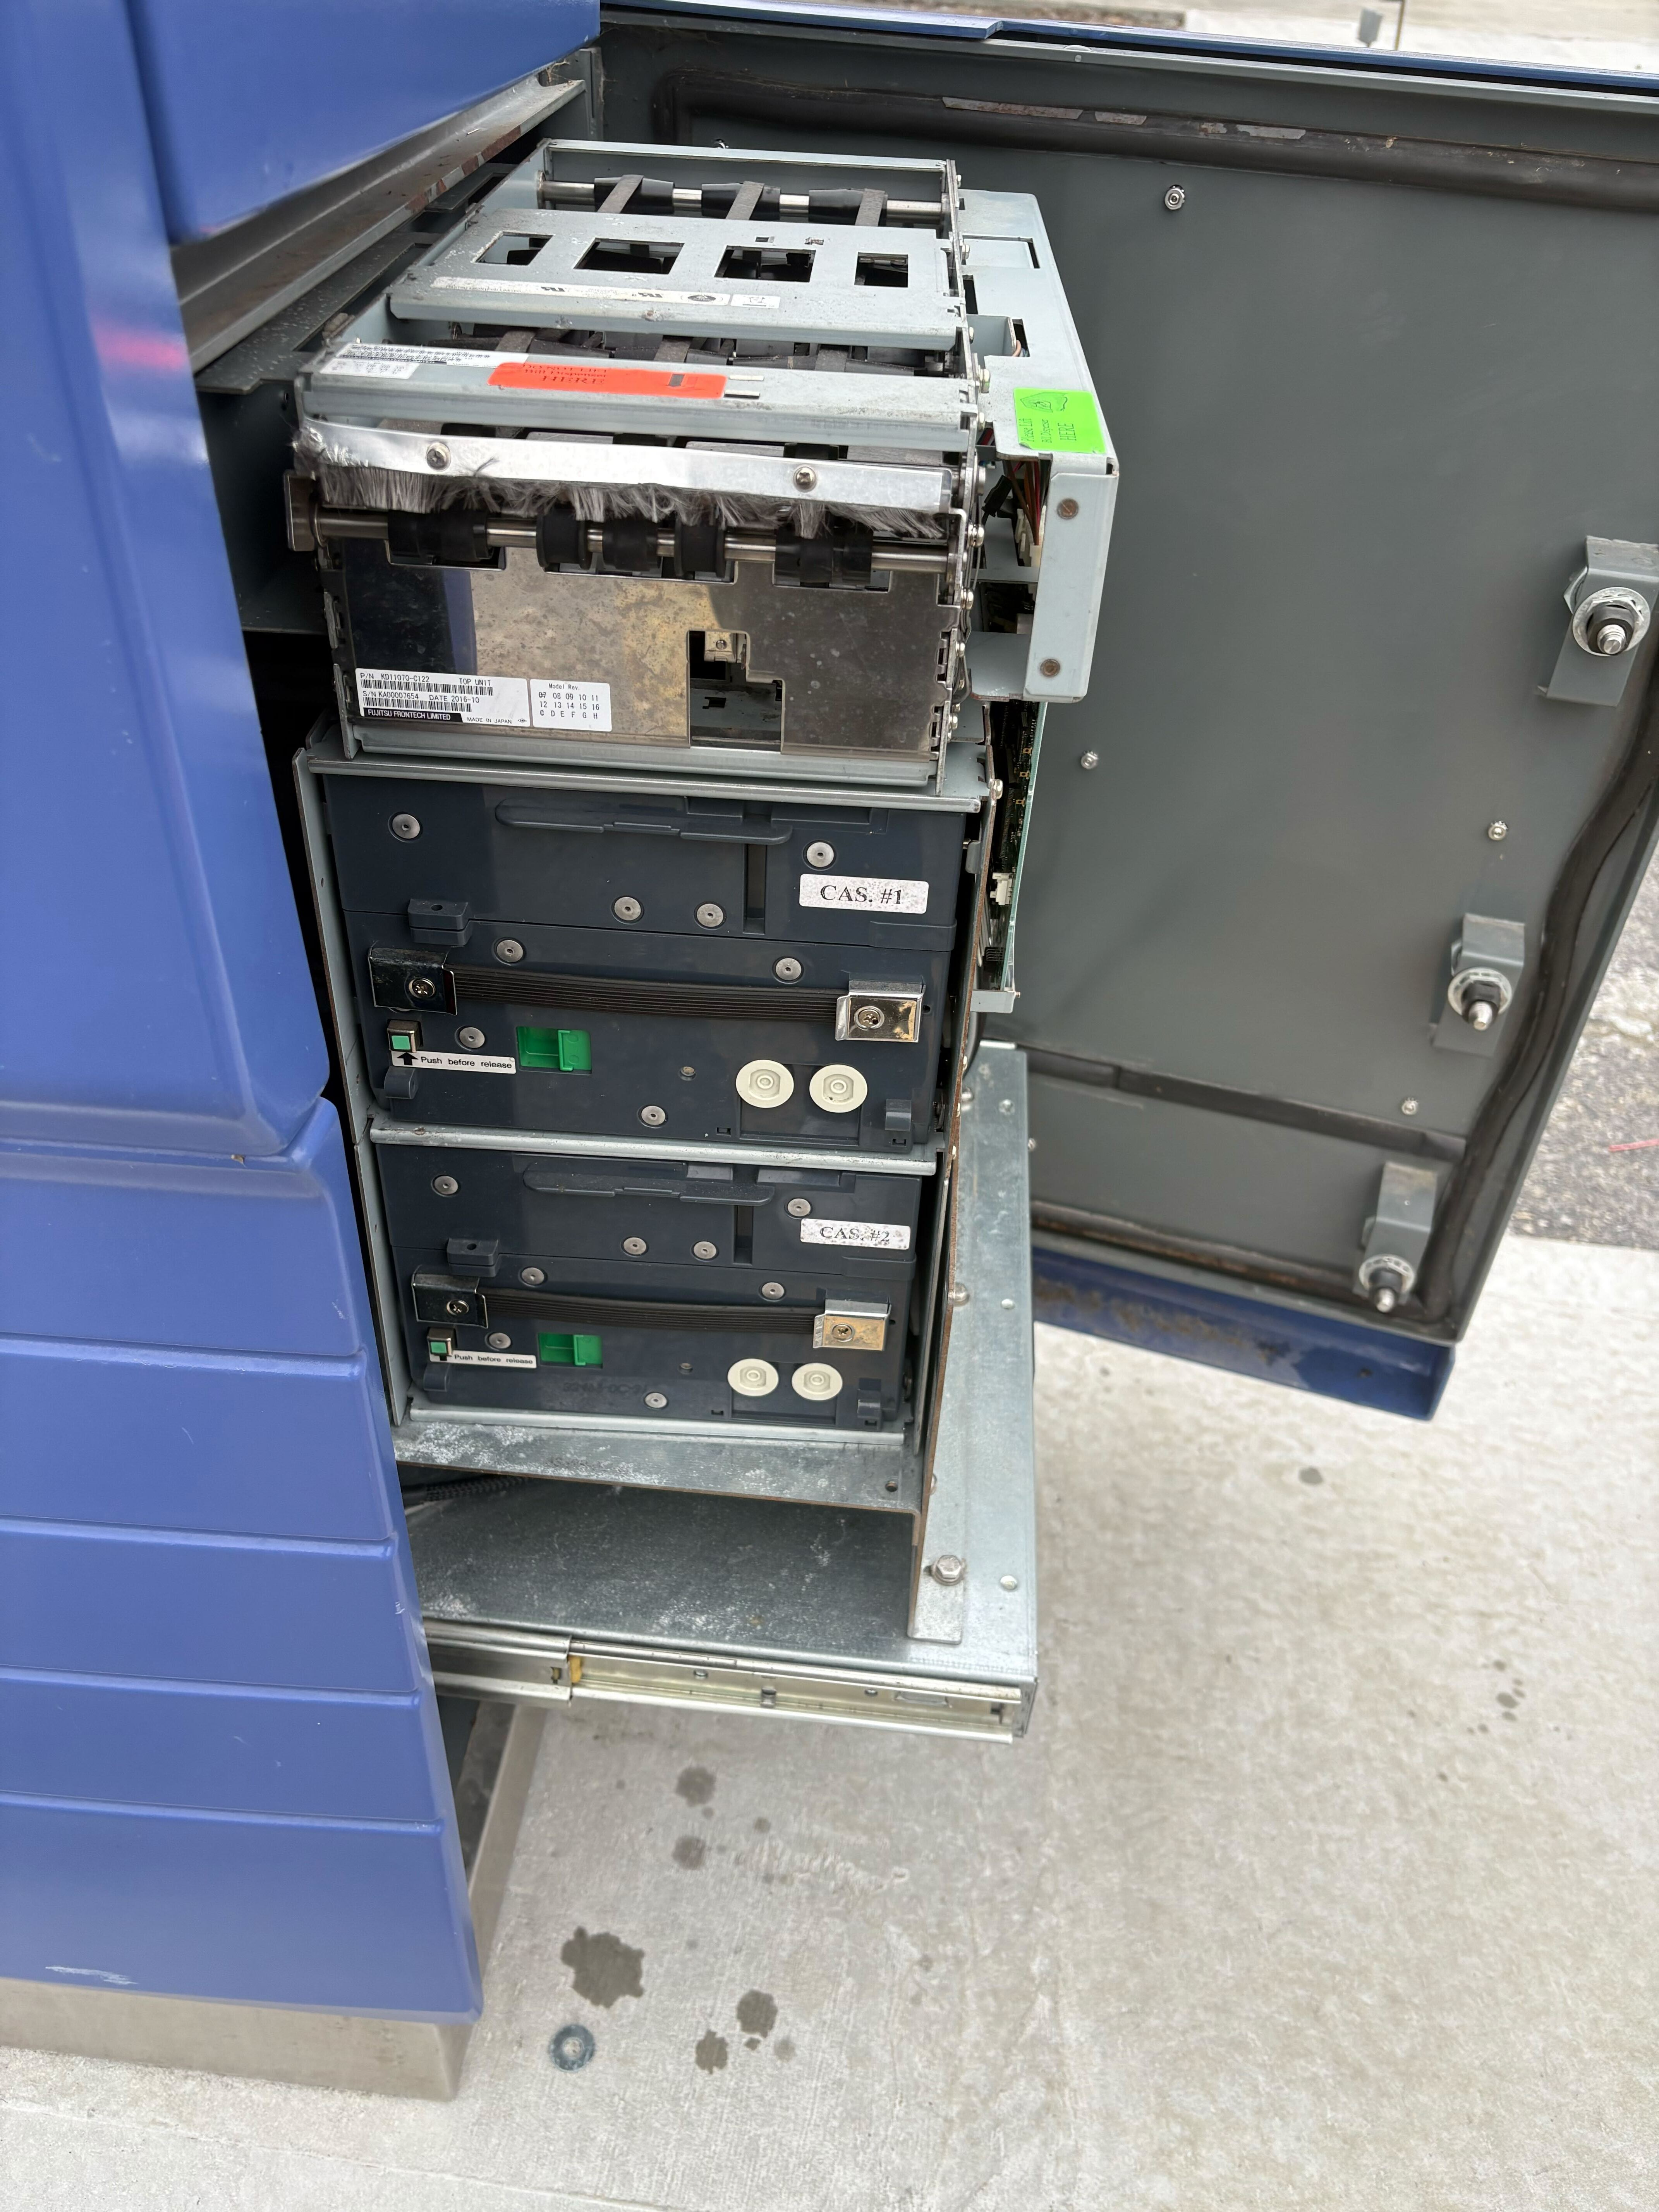
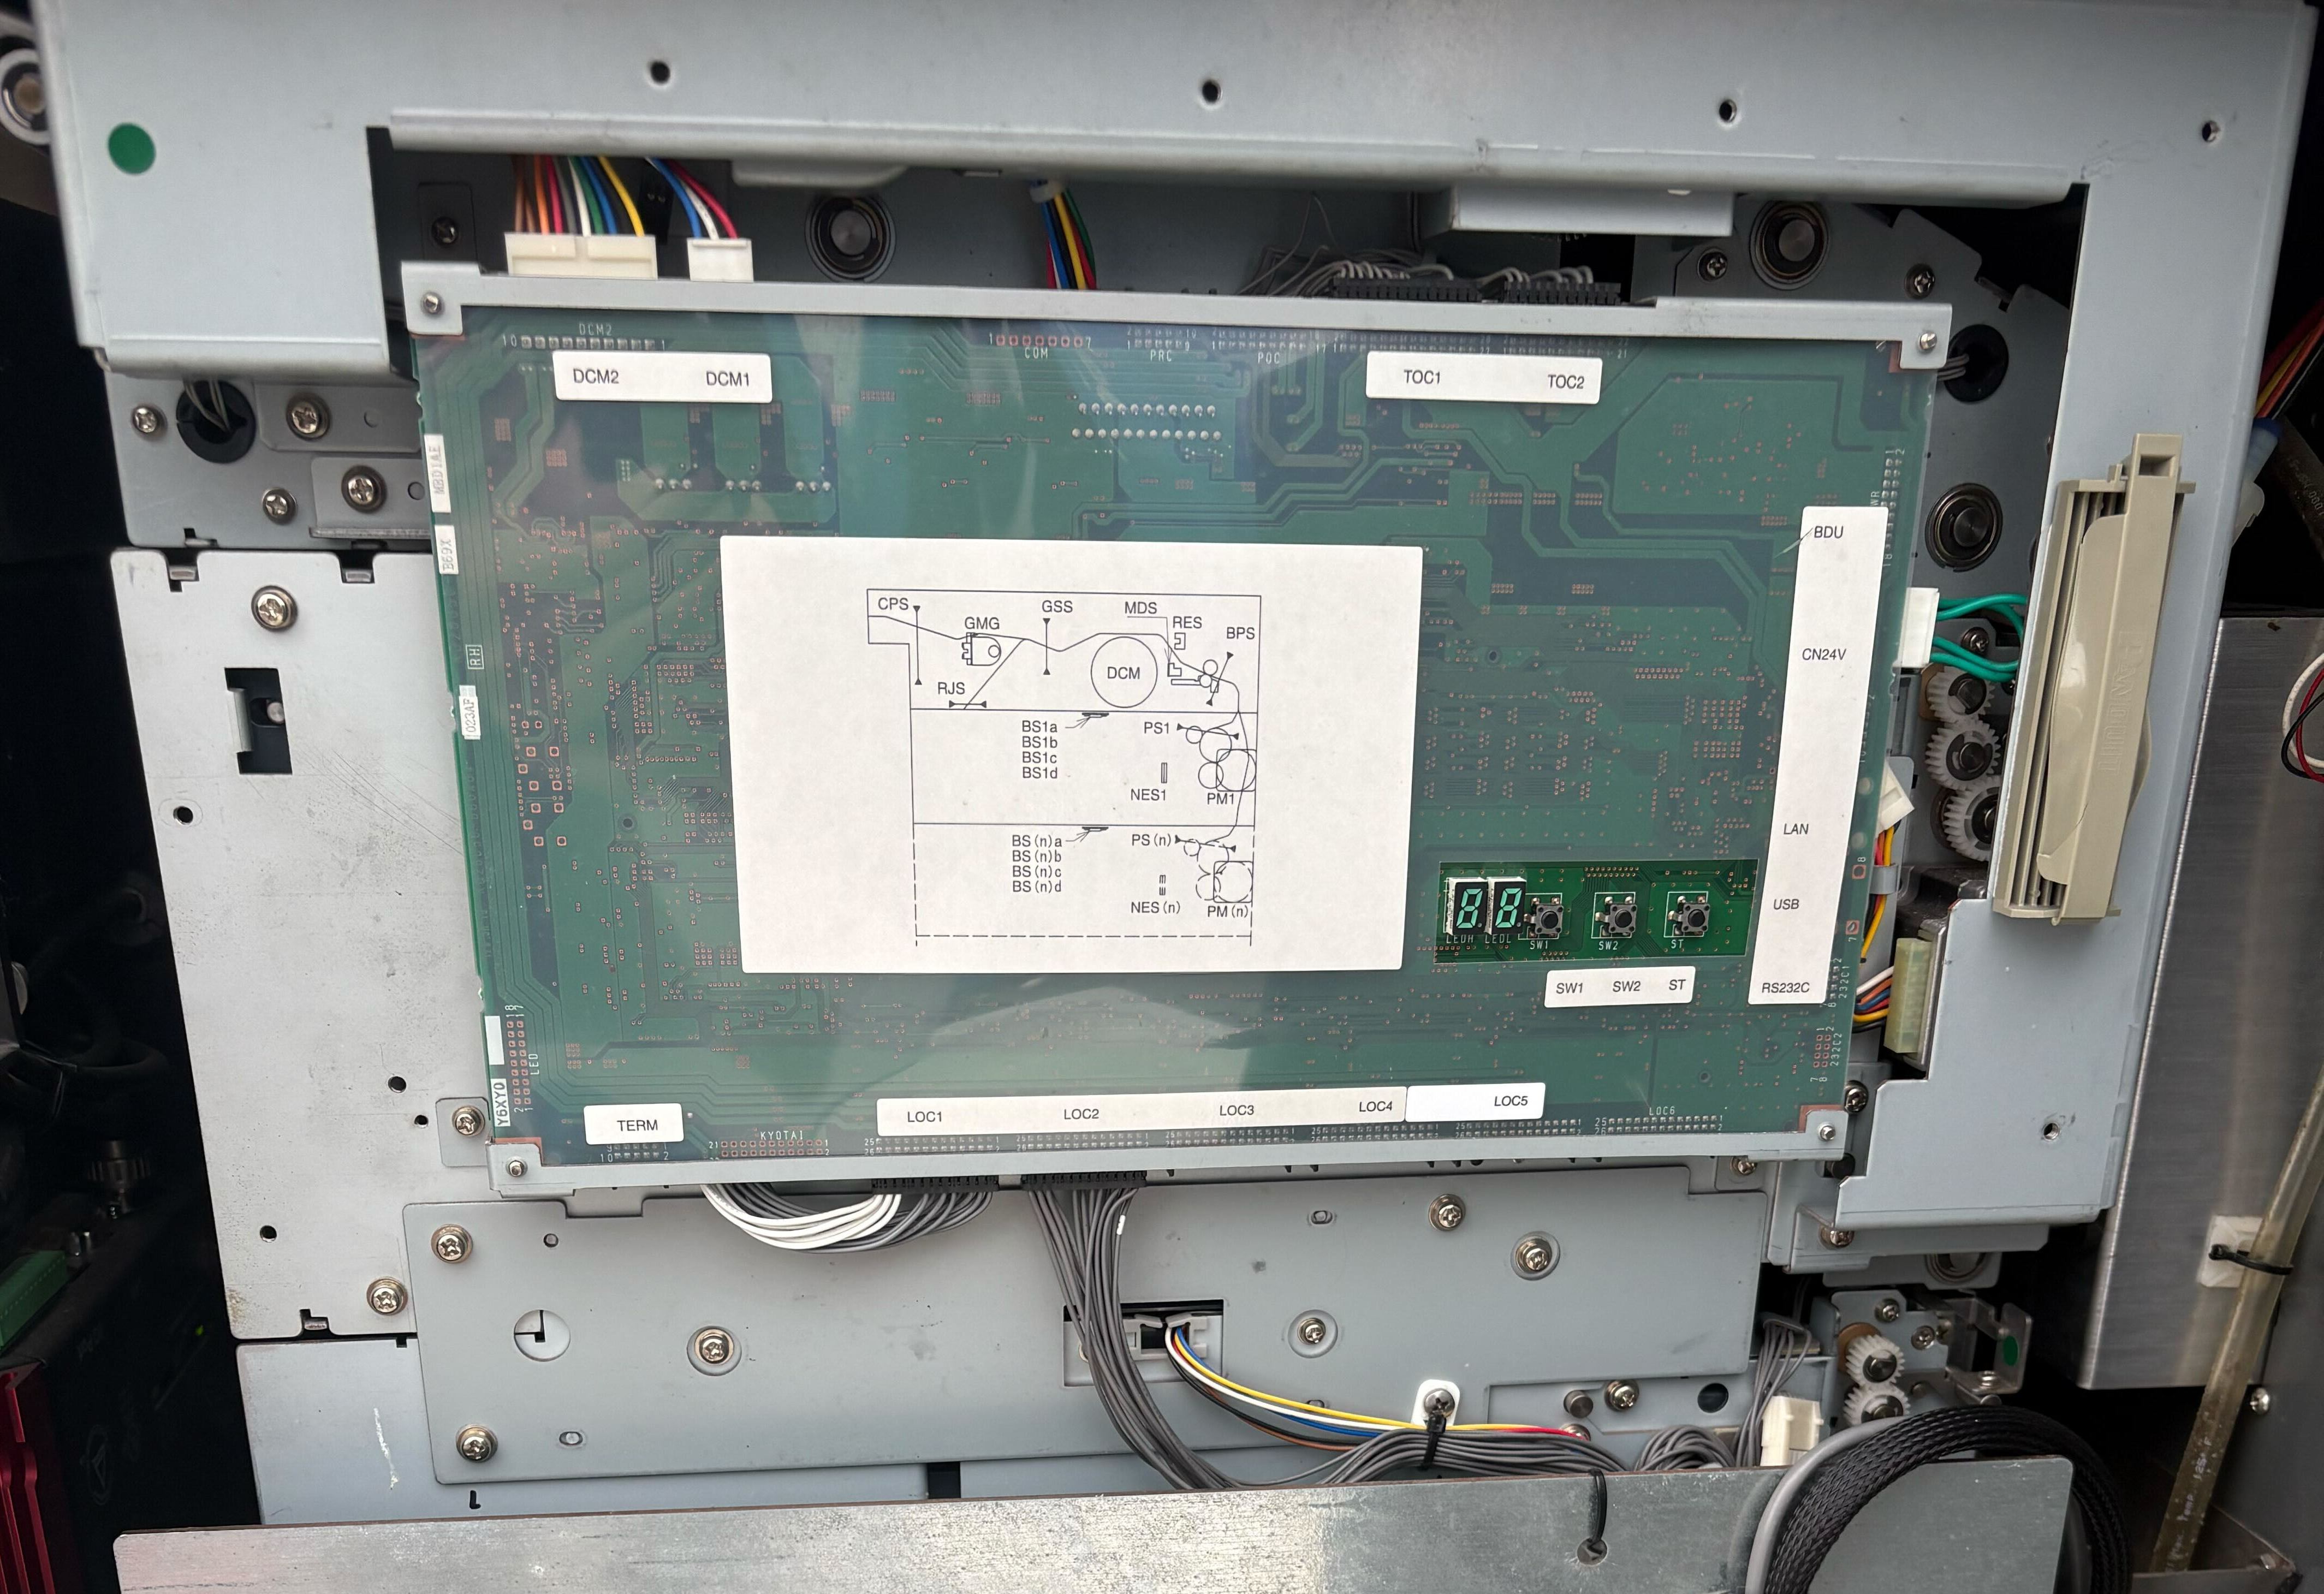
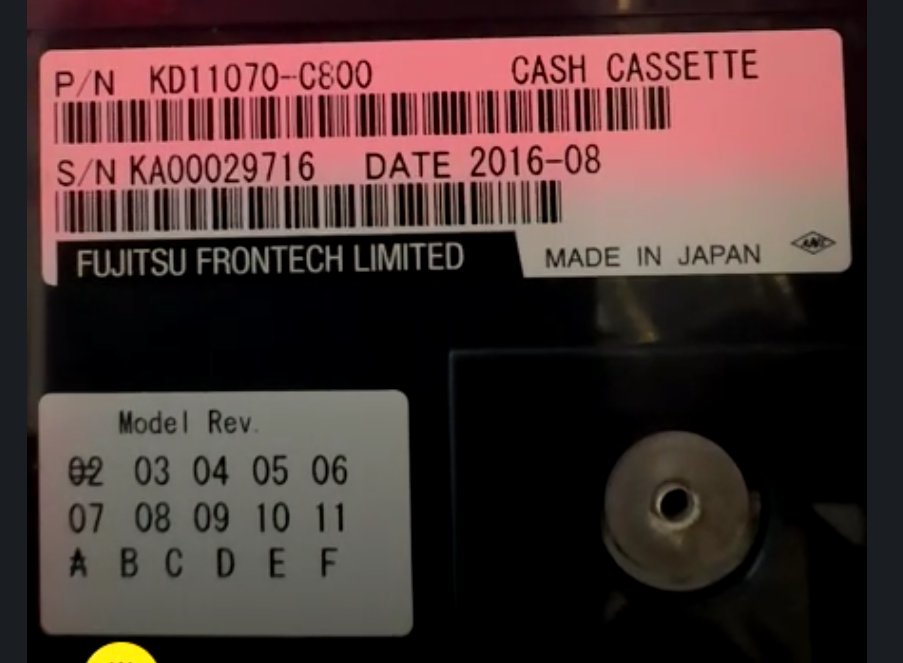
The Fujitsu F400 photos show the dispenser, cassettes, board and cassette label. Board labels include RS232C, USB, LAN, CN24V and diagnostic-display labeling. The integration uses a rainbow cable and serial-to-USB converter.
Changes and validation
Select the supported installer and configuration for the installed release with NXT Wash support. After an authorized configuration change, restart the relevant service during the agreed window, confirm device connection, verify Cash Management, and have an authorized operator validate cash levels and the transaction test.
Middleware installer and commands
Install and commission middleware, or open the command reference for logs, service checks, updates, certificates and cash maintenance.