Mag Reader
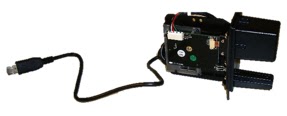
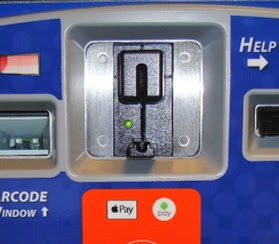
Front of XPT Main Door
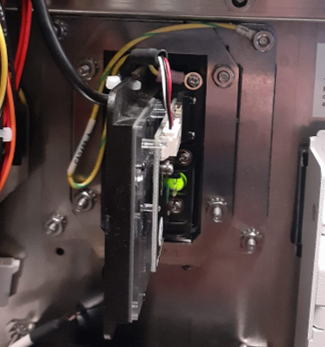
Rear of XPT Main Door
Connections
The magnetic card reader is USB-powered and includes a single cable for power and communications that connects to the USB hub on the display module. A second cable grounds the card reader to the main door and is critical for providing reliable communications with the device. Both of these cables ship with each XP11100, with one end pre-attached to the magnetic card reader.
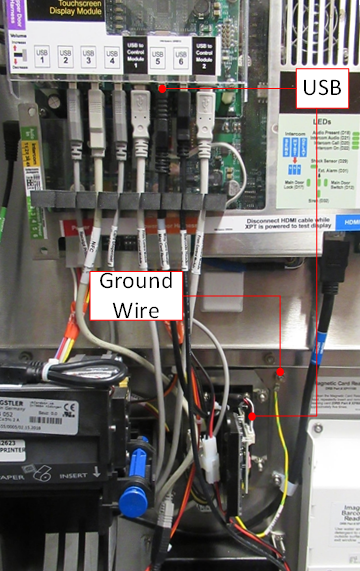
*USB cable could be connected to any of the (6) USB ports on the display module, and ground wire could be connected to any nearby metal stud on the main door.
Serviceable Fasteners
Maintenance
The magnetic card reader accumulates dirt over time and needs periodic cleaning.
To clean the card reader, repeatedly insert and remove a pre-saturated disposable card reader cleaning card.
The cleaning cards can be purchased through DRB Systems (part #XP80001).
Canned compressed air can also be used to clean dirt and dust from inside the card reader, but won’t necessarily remove heavy buildup from the read head that cleaning cards will.
Replacing
Turn off the XPT before modifying any power wiring connections.
An employee with security access must enter his or her employee information into the XPT after unlocking, but before opening, the main door. Failure to follow this procedure causes the alarm to sound.
Tools needed
11/32" nut driver
Turn off the XPT.
Unlock the XPT main door. The security login screen appears.
Log in to security. The Main Status Screen appears.
Open the XPT main door.
Turn the power off using the switch on the front of the power module.
Disconnect the magnetic card reader USB cable from the display module USB hub.
Remove the magnetic card reader.
Loosen and remove the hex nut securing the ground wire to the door using a 11/32" nut driver.
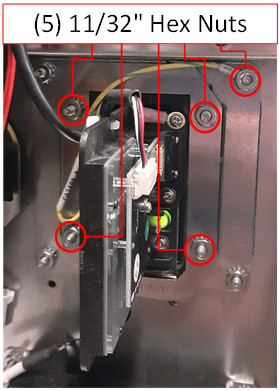
Loosen and remove the (4) hex nuts from the magnetic card reader bracket, and the (1) hex nut from the ground wire, using an 11/32” nut driver.
Remove the magnetic card reader and mounting bracket from the studs on the main door.
Install the replacement magnetic card reader.
Slide the replacement magnetic card reader over the studs on the main door.
Slide the mounting bracket over the magnetic card reader.
Tighten the (4) hex nuts on the magnetic card reader mounting bracket using a 11/32” nut driver.
Connect the ground wire to a stud on the main door and tighten the hex nut using a 11/32" nut driver.
Connect the USB cable on the replacement magnetic card reader to the display module USB hub.
Turn on the XPT and log in to security.
Turn the power on using the switch on the front of the power module. The XPT starts up and the security login screen appears.
Log in to security. The Main Status Screen appears.
Test the magnetic card reader operation in maintenance mode.
Press the Enable & Test Hardware button. The Enable & Test Hardware screen appears.
Press the Payment Card Readers button. The Payment Card Readers screen appears.
Verify the magnetic card reader status is OK.
Insert and remove a credit card from the reader, and verify that both Track 1 and Track 2 data are displayed as Valid.
When finished, press Exit twice.
Close and lock the XPT main door.
Troubleshooting
*An employee with security access must enter his or her employee information into the XPT after unlocking, but before opening, the main door. Failure to follow this procedure causes the alarm to sound.
Magnetic card reader status in maintenance mode is anything other than OK (0)
Disable and enable the magnetic card reader in maintenance mode.
Restart the XPT from maintenance mode.
Navigate to the Main Status Screen.
Press the Reboot Terminal button. The XPT reboots.
Verify the USB cable connection at the device and on the display module USB hub.
Gently wiggle the USB connection on the magnetic card reader and verify its status in maintenance mode does not intermittently change.
Disconnect and reconnect the magnetic card reader USB cable to the display module USB hub.
Connect the magnetic card reader USB cable to a different port on the display module USB hub.
Restart the XPT from maintenance mode.
If the problem persists, the magnetic card reader should be replaced.
Magnetic card reader AND any other device connected to the display module USB hub indicates a communication-related error in maintenance mode
Common XPT device communication-related error statuses.
Adjust the USB cable connection.
Disconnect and reconnect the (2) USB cables between the display module USB hub and the USB ports on the front of the control module, and then restart the XPT.
Connect the (2) USB cables between the display module USB hub and the control module to different USB ports on the front of the control module, and then restart the XPT again.
Swap the position of the (2) USB cables from the control module at the USB Type-B ports on the display module USB hub, labeled “USB to Control Module 1” or “USB to Control Module 2”, and then restart the XPT again.
Magnetic card reader stops responding to card swipes or disconnects after a card is swiped
Verify the magnetic card reader includes a label indicating "Conductive Chassis," "Rev. G" (or later Rev.), or "DA-102919-1". Any of these indicators denote the card reader was manufactured with a conductive plastic chassis.
All new XPTs and replacement card readers that shipped on or after 9/17/2019 include the conductive chassis.
If the card reader is not a conductive chassis, contact the DRB Systems Order Team.
Verify that the ground wire is attached and secure to the card reader and a metal stud on the XPT main door.
Verify the XPT is running middleware version 2.22.9 or later, as displayed on the Payment Card Readers screen in maintenance mode.
This version of middleware is included with SiteWatch 24.0.1.83 or later.
White Water guide · Download PDF ↗